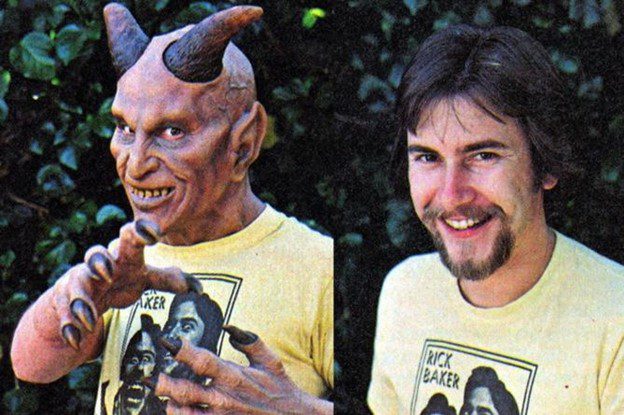
In an interview with Fangoria magazine, professional wrestler Danhausen explained that as a child it took his father a long time to get his mask right on Halloween. And for a while as a pro wrestler he stole an iconic horror look from Converge’s album “Jane Doe.” This look took him hours to put on before each match. As the article points out, this was “not worth the hassle of being destroyed almost the moment he walked in the ring.” Fortunately his father is no longer his make-up artist, and he has found a new mask that is simpler to apply.
But the issue remains the same for everyone who wears a mask. The perfect mask, a blend of paint and prosthetics, can take a long time to apply. Doing this every night for a haunted trail or haunted house scene can be draining.
Here is the process that your local entertainers go through each night in order to make you scream.
The haunted mask process
Wash and dry: the best mask has to go on a clean and dry base. Dry means ‘no oil’ so the mask process starts with washing and drying the face.
Apply base prosthetics: whether it is a bulging forehead, or a seeping cheek wound, the prosthetics need to be glued to a segment of clean, dry skin, or else they will slip off in the wrong moment and ruin the illusion.
Contacts: if the look requires contacts, they go in before the work gets too far along. You don’t want to accidentally transfer paint or glue into your eye!
Blend prosthetics with base: in order to look as life-like as possible, each prosthetic is blended in to look as if it is actually part of the face, neck, hand, or other body part. As a shortcut, artists can cover these seams with clothing, but the illusion needs to be airtight or someone’s night won’t be as memorable and as scream-filled as it could have been!
Paint: whether the person wants pale white skin or demonic red flesh, there is a paint color for that. Add wet effects at the end for the perfect seep or ooze.

Screen capture from Fangoria Magazine online.
